Showing posts with label knitting. Show all posts

Friday, 7 March 2014

Easy Knit Headband!

^^ can be worn with your hair up ^^ 
^^ or your hair down! ^^ 

^^ helps keep your ears warm ^^ 
Here's another SUPER easy headband pattern. It's easy enough for the beginner knitter! 

What you'll need: 
1/4 skein of yarn 
7.5 cm needles

Directions: 
Cast on 12 stitches and knit until the headband is a tiny bit smaller than the circumference of your head (you can measure or you can just try it on before you cast off). Then stitch the ends together. To make the front pinch pull the two edges together and stich them together (with an embroidery needle of you can go through the holes by hand) a few times and knot. Simple as that! 


^^ finished headband ^^

^^ after pinching the front together ^^

Have a great weekend!
-M 

Wednesday, 19 February 2014

Another Knitted Infinity Scarf


I don't want to lie and say that I am an expert knitter, or even a great knitter, but I know how to knit and I want to share one of my favourite patterns! I love making quick easy pieces that don't take me too long, and to be honest this is probably one of the easiest pieces you will find. Ali posted a slightly different version here if you want to check it out.

Materials needed: 
Yarn - at least one skein ( a single bundle)
25 mm knitting needles (they are huge! but they make the scarf nice and chunky, with big holes)
Large embroidery needle (optional)

Directions: 
1- Cast on 18-20 stitches
2- Knit enough rows to loop around your neck twice ( I used the whole skein for this scarf and it wrapped perfectly around twice, if you want a longer scarf, you will need 2 skeins), since the needles are so large, this can take as little as a few hours!
3- Sew the two ends together, you can do this by hand since the holes are so big, or with the embroidery needle.
4- Wrap around your neck twice and enjoy!

^^ one skein of yarn ^^ 
^^ giant needles ^^

^^ the needle I use to sew the ends together ^^ 
^^ the completed scarf before I attached the ends together ^^ 
^^ I love this pop of colour ^^

-M

Tuesday, 28 January 2014

Knitted Headband with Flower

I  wanted to try something a little more challenging than just a simple scarf or headband, but mitts and toques were still too scary to jump into. I decided to add a small flower onto my headbands, because if I messed up it wasn’t a big project to start over. I used this pattern and it actually ended up working the first time! I wasn’t expecting it to work out very well so most are the pictures are blurry since I just took them on my phone.

Cast on 4 stitches

Row 1. Knit front & back of 1st stitch, knit 3 (5sts)

Row 2. Knit front & back of 1st stitch, purl 4 (6sts)

Row 3. Knit front & back of 1st stitch, knit 5 (7sts)
Row 4. Knit front & back of 1st stitch purl 6 (8sts). Cut yarn leaving a 4’’ tail and leave on a spare needle, or just push it to the bottom of the needles you are using.
Repeat 4 more times but do not cut the yarn on the last petal

Row 5. Join all petals by knitting across (40 sts)
Row 6. Purl 2 together across row (20 sts)
Row 7. Knit 2 together across row (10sts)
Row 8. Purl 2 together, purl 3 together, purl 2 together, purl 3 together
Thread yarn through stitches and pull tight and sew into place. Secure all loose ends.

I then searched the house for any old buttons, and sewed them onto the middle, and finished it by sewing it onto the headband. 

This is when I was trying to decide which button looked best
These make a great gift and are extremely practical during the freezing winters in Canada. I have given many to my friends and family for Christmas and birthdays and I've even made a few for baby gifts!

-A

Tuesday, 21 January 2014

Style and Beauty Circle


Hi, I'm really excited to be writing my very first blog post, and what better way to kick it off than to talk about the chance we had to do some work for a great organization!

I have been knitting for the past year or so, I'm still in the beginner stages, but I love it.  I knitted my friend a scarf a few months ago and her co-worker loved it- yay! She got in touch with me and asked whether I would be interested in donating a few handmade pieces for a silent auction put on by the Style and Beauty Circle - check out their event page here. They support the Suit Yourself organization that helps women in need find employment and return to the workplace in confidence - check out their page here.

Over the holidays, I had actually been researching some ways to get involved and give back to the community, whether it be by volunteering my time, donating gently-used items, or in various other ways (not really a new years' resolution...but pretty much). This chance to donate to the Style and Beauty Circle silent auction seemed like the best way to start getting involved, and giving back. Ali was interested in donating a few items too - all in all, we were able to donate five headbands and a few bars of our tangerine castile soap. The patterns and recipe are to come!
^ homemade tangerine castile soap ^
^ The headbands we donated ^ 

If your closet is overflowing like mine... think about donating to this great organization that helps women in need. I already have a few bags waiting to be dropped off!

-M

Monday, 20 January 2014

Knitted Infinity Scarf

One craft that we started last winter was knitting. Although many laughed that this activity was only for old ladies, it has proven quite useful in our frigid Canadian winters, and we have since had people requesting us to make them something warm. The most exciting part of taking up a new craft is buying all the materials you need for it. So, of course, we scrounged up any materials we could find in our basements then went out and bought the rest.
We decided to keep things simple to start, and what’s easier than a straight, simple patterned scarf? Or so we thought. There were some times we had to start over, had holes we didn't know how to fix, a little bit of anguish and frustration, but eventually got the hang of it and in fact, it even became quite simple.
After accomplishing the basic scarf, we wanted to try something that still encompassed the general principles but was a bit more complex and stylish. We decided to take on knitting a cowl or an infinity scarf. 
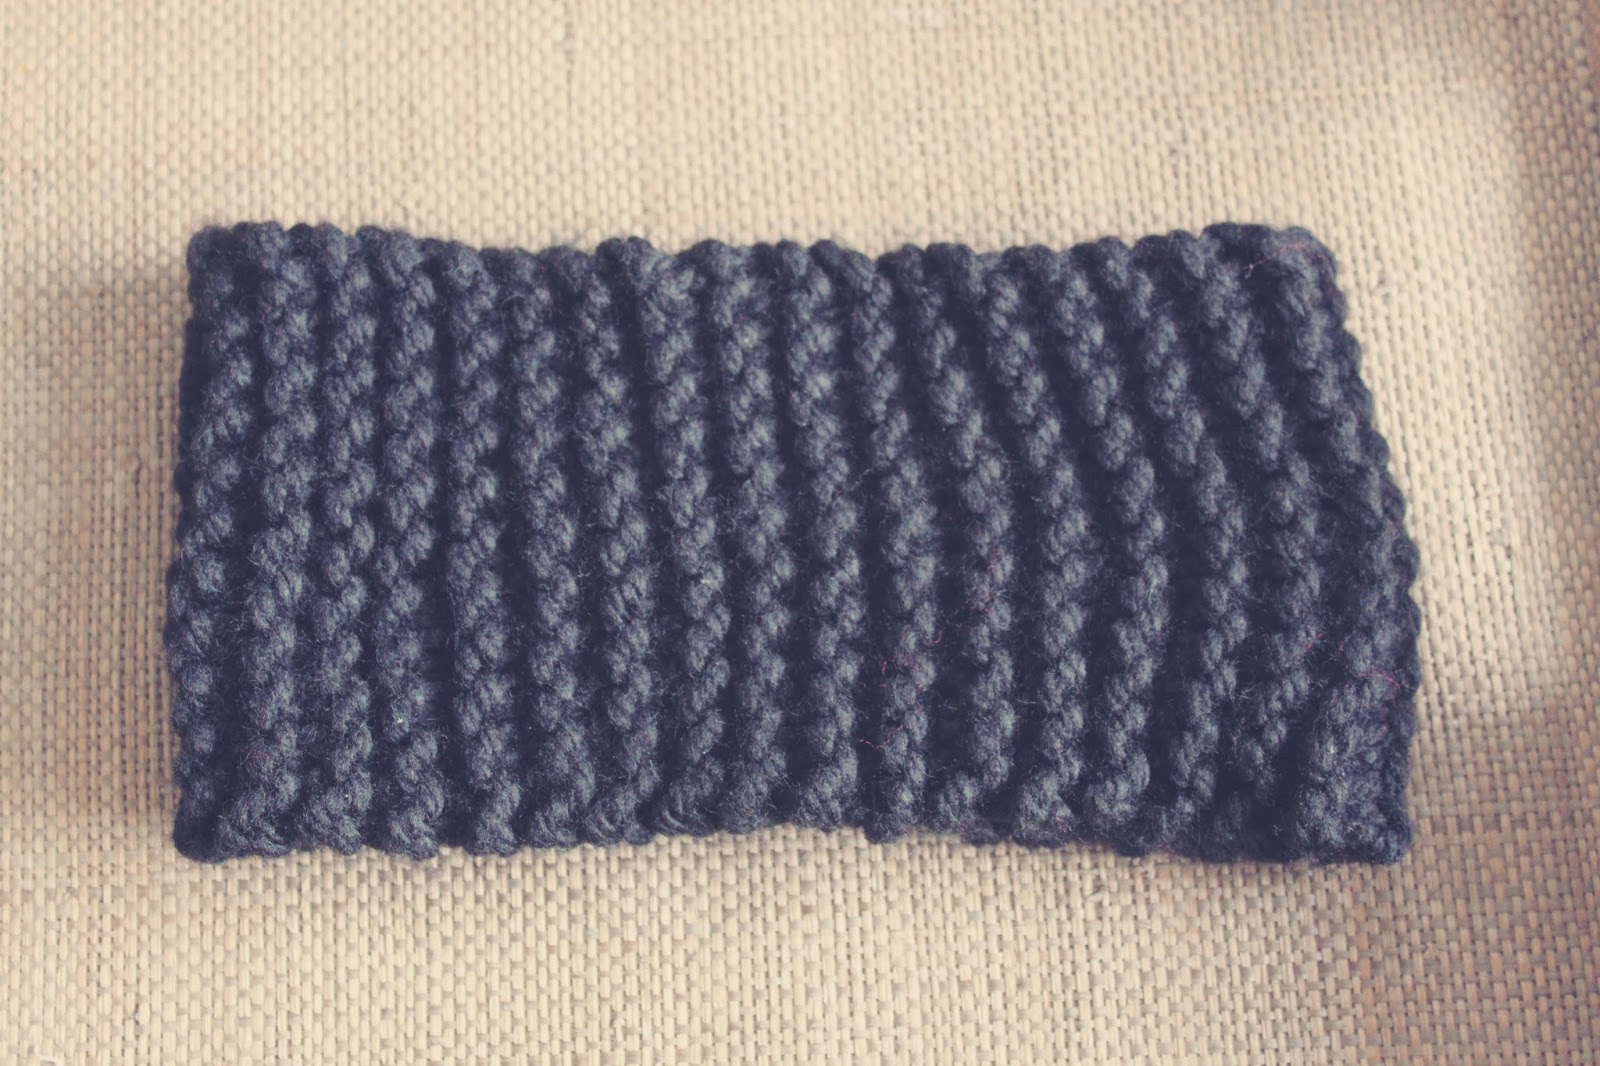
In this pattern, we used 25mm needles and a thick wool to create a large chunky look. These needles may be hard to adjust to in the beginning, but their large size allow you to make scarves very quickly.
We did a simple K1, P1 pattern to give the scarf a smooth appearance, which did create some challenges, as this pattern caused the edges to curl in. We compensated for the curling edges by making the scarf extremely wide, casting on 35 stitches. Once completing it to the desired length, we knit the scarf together to form a cowl. Instead of attaching each end of the scarf together, we attached one end of the scarf to the side of the other end, causing the scarf to sit in a 'V' form on the body. This was the completed look. (This is also the scarf I am wearing under my orange jacket in the picture on our home page.)


-A